Showing posts with label embossing paste. Show all posts

Saturday, February 13, 2010

Unscripted Sketches # 42

DSC_0009

DSC_0012 DSC_0011

SK sketch 14 US sketch 42

Wow these Saturdays are flying by!!!! Welcome to another Sketch it Saturdays with Unscripted Sketches. I challenge you to shake off those winter blues and take this sketch by the horns and give it a go. MAKE IT YOURS. I know I am feeling the effects of this winter and the blahs have found their way into my crafting and blogging. SO, blow me away with your interpretations of this sketch! I NEED some inspiration.

As you can see I flipped the sketch on it’s side and used the image from my metallic embossing paste tutorial. LOVING this color combo. That cute little butterfly is one from CTMH’s new Just Blooms spring set!!! I am in LOVE with these flowers and butterflies. The sentiment is PTI.

So help me out here guys..give this challenge a try so I can come and get some inspiration from you…I need it!

Love me some winter Olympics..:0) downhill skiing is my favorite event, what’s yours?

Enjoy!

Thursday, January 28, 2010

Embossing tutorial #3..Using Embossing Paste Scroll Down for #1 and #2

So I went and played with a brass stencil and thought I would share…I have so many pictures though, I will split them into 3 posts..so scroll!

DSC_0002

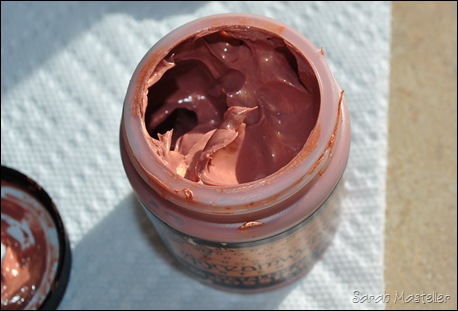
This is what I used. I also used PTI cardstock..the thicker the better (less warping). If you live in Des Moines you can buy this stuff from Outstamping by Design in Valley Junction…otherwise I Googled this store http://www.franticstamper.com/dreamweaver.htm

And the Dreamweaver website.http://www.dreamweaverstencils.com/paste.html

You definitely NEED a palette knife (one with a flat edge)….and masking tape…the kind you can pull off paper without it tearing (mine tore). As I was using the metallic paste first and my cardstock warps, I taped it to the counter for extra stability.
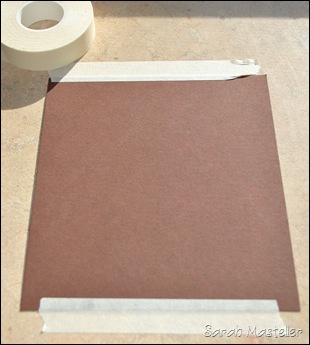
DSC_0003

DSC_0004 Then I taped the stencil in place.

DSC_0006

DSC_0007

Getting ready to slather the paste on.

DSC_0008

Then ‘shave’ off the excess with the knife. Bear in mind I have never seen anyone do this…I really am just winging it ha ha!

DSC_0009

The idea is to get a smooth flat surface..not like this .

DSC_0010

You can see the cardstock is warping already. Now the trick is to CAREFULLY lift off the stencil. I have found leaving one little bit of tape on the edge is safest..then you just lift it up (don’t drop it).

DSC_0011

DSC_0012

You can see some smudging on that bottom flower..when the cardstock warps you can’t get the stencil nice and flat and the paste leaks out underneath.

DSC_0015

This takes at least an hour to dry…so put it somewhere SAFE (so you don’t accidentally sit on it…I am just saying!)

OK now on to the white paste
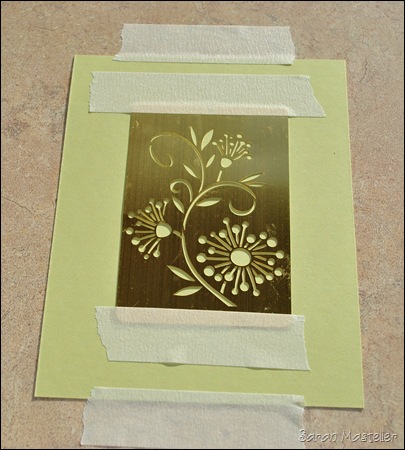
DSC_0016

DSC_0017

Ohhhh and before I forget…as soon as you are done..recap these babies and rinse off your stencils and knife..it dries really quickly.

DSC_0018

DSC_0019

Here I had an AHA moment. I had some thick acetate sitting there and I though…heyyy I can use that instead of the knife…so I did and it was easier!

DSC_0020

I had been mixing perfect Pearls on it. It scraped it off really flat.

DSC_0021

Don’t worry about the excess as you can trim the image when it is dry.
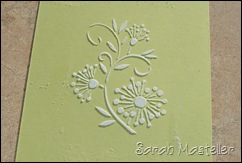
DSC_0022

DSC_0024

While it is still wet you can add Prisma glitter (sticks really well).

DSC_0027

Just pretend it looks all sparkly.

DSC_0029

Well there they are waiting to dry. I will have to make some cards with them later. Hope this was helpful. I am going to post a couple more after this post.

Embossing Tutorial #2

In this tutorial I am going to show you how to use a light box vs your Cuttlebug with a brass stencil

DSC_0036

Here is my cheap light box

DSC_0037

DSC_0038

Same stencil as before and I taped it down.

DSC_0040

DSC_0041You HAVE to use light cardstock with a white core or you cannot see the stencil through the CS. Also if you are going to sand the image you need a white core. These are my embossing styluses.

DSC_0043

DSC_0044

Then you just trace the image pushing with the stylus. You are supposed to rub the CS with waxpaper first so you don’t slide but I always forget.

DSC_0045

DSC_0046

Awwww pretty!

Now to achieve the same effect in 5 seconds with your Cuttlebug.

DSC_0051

HA! ANNDD it’s glittery. The image is embossed SO well even the serial number embossed on the CS.

I read somewhere this works best if the CS is wet…BUT I didn’t have a mister to hand, so (light bulb moment), I grabbed my glimmer mist…now my CS is shimmery and wet :0). I ran it through the CB with this stack…A plate, Stencil, wet CS, tan embossing mat from Spellbinders, 2 pieces of CS to shim and 2 B plates….

DSC_0050

Enjoy!!!

Embossing Tutorial #1

Ink, sanding, and chalk with a brass stencil

DSC_0031

DSC_0032

I used Ranger distressing inks and a stencil brush….this was an experiment…I have never done it before.

DSC_0033

DSC_0035

Not too bad…don’t know if I like it though.

DSC_0053

DSC_0056 DSC_0054

This one I did by embossing with the stylus and rubbing chalk over the image before removing the stencil.

DSC_0055

This one I just sanded after I had embossed the image.

Well I hope these were helpful.

Enjoy!

Tuesday, January 26, 2010

Some More Kraft Valentines….

DSC_0019

DSC_0018

DSC_0002

DSC_0005

DSC_0023

Inside the card….DSC_0001

OK, these were ULTRA simple even for me ha ha!!! BUT they were quick and easy and fun :0) . My DD says the heart that’s all broken doesn’t look like a valentines but a broken heart card…she is probably right !  The hearts were either punched or cut with my Sizzix and they are all pop dotted. The last 2 photos are the inside and outside of the same card. I think that on wins the prize for my most minimalist card ever!

Here are some more valentines I was playing about with. I used some more embossing paste with prisma glitter this time..

DSC_0006 

DSC_0011

DSC_0013 DSC_0009

The hearts are VERY sparkly in real life…as is most of my craft space too . I am not liking these too much…I should have used a softer grey.

Well we are recovering from another blizzard here…pretty bad one actually with lots of accidents and roads closed. The wind was terrible…and the snow made conditions dreadful. You know it is bad when the close the interstate and pull the plow drivers off the roads. We were fortunate that we didn’t loose power and of course no snow days for homeschool kids :0)

I see I have reached 100 followers..I  am floored, amazed, grateful, gob smacked (British word), and just truly blessed. I want to thank you all from the bottom of my heart and a big thanks too, to everyone who leaves me comments. I will have to see what I can rustle up in the way of some candy so stay tuned.

Enjoy!

Related Posts with Thumbnails